Email Updates for IDX Broker Returning Visitors

At RealtyCandy, we’ve created many Premium IDX Broker features and tools that we offer to our clients for FREE. One of the free tools that we frequently get questions about is for our daily returning visitor report email service. People often want to get email or text updates rather than have to manually keep track of leads. That’s why we created our text alerts and email alerts tool.
Text Alerts allows you to receive a text every time a visitor registers, or a visitor who’s made an account returns, to let you know the last page they were viewing on your site. Our connected email alert, sent daily, lists all of the new and returning visitors of the day at once.
Our email alerts and text alerts are connected to the same app named Text Alerts, and both updates can be configured individually or in conjunction with one another.

Why Successful Brokers Use Email Updates
If you really want to be effective with your follow-up, you need to reach out to the people who are the most interested while they are showing their interest. Really great agents use this service because they want to stay in the know about their leads, but they also don’t have the time to manually check on every website visitor.
Email updates are the best of both worlds because, with daily information, you’re always kept up-to-date, but you’re also never left feeling constantly hassled with separate updates or the need to check on your site traffic multiple times a day.
This tool can help you maintain higher productivity by making it easier to monitor new leads, allowing you to draw in more business at once, which will, in turn, increase your sales momentum.
Continue reading the instructions below to learn how to configure the email alert to easily obtain this daily visitor report.
To configure the text alerts, follow the same instructions, inserting a cell phone number instead of an email and activating the corresponding toggle switches.

Configuring Email Updates
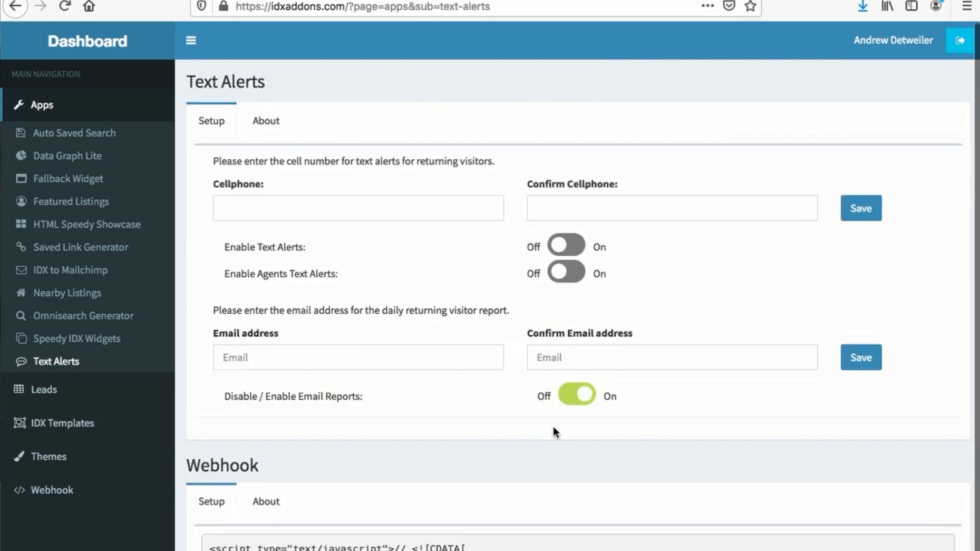
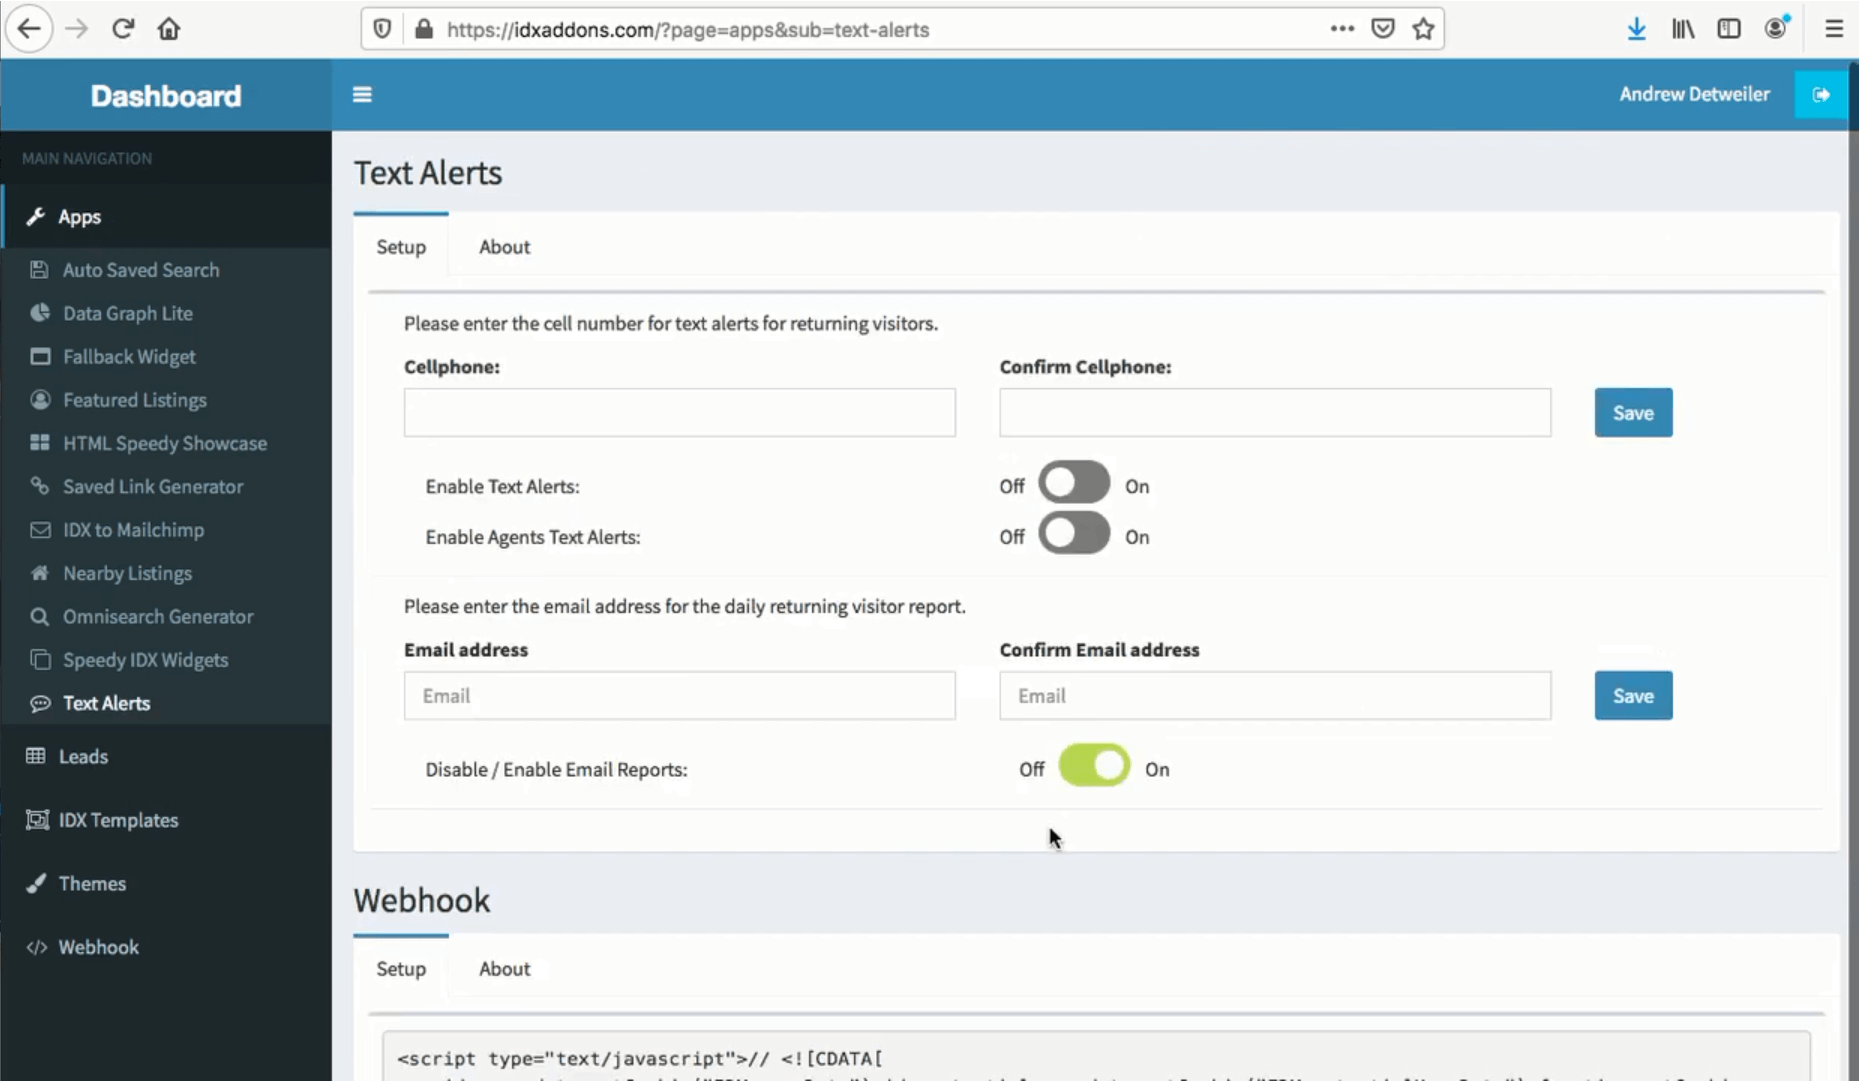
This email and text alert tool is located at IDXAddons.com on the Apps page. When looking at the Applications, it is the Text Alerts link on the sidebar and image/button with the corresponding label.
Once you are on the page, scroll to where it asks for an email address and to confirm the email address and type your email into both boxes. Below the box to confirm your email, there is a toggle switch that turns the email reports on and off. Click it to activate or deactivate the email aspect of this tool.
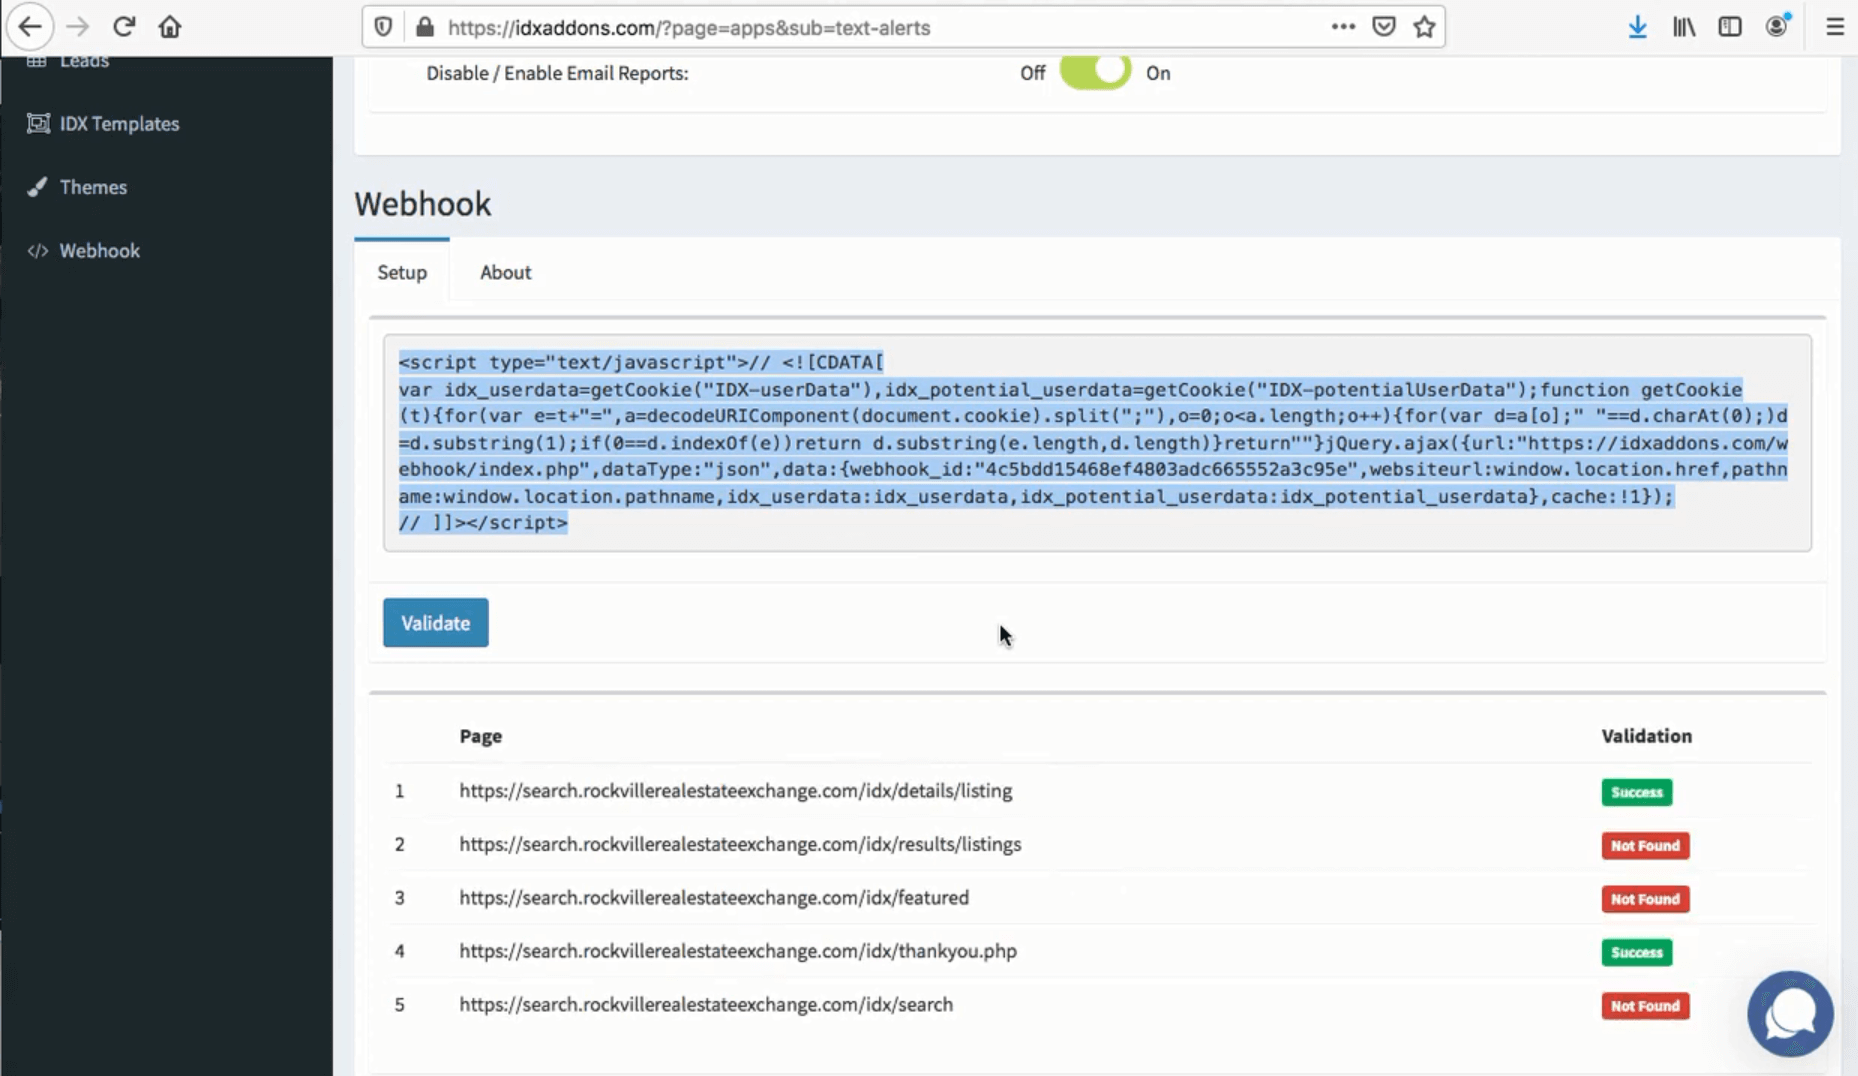
Then, copy the Webhook script at the bottom of the page that’s specific to your account.
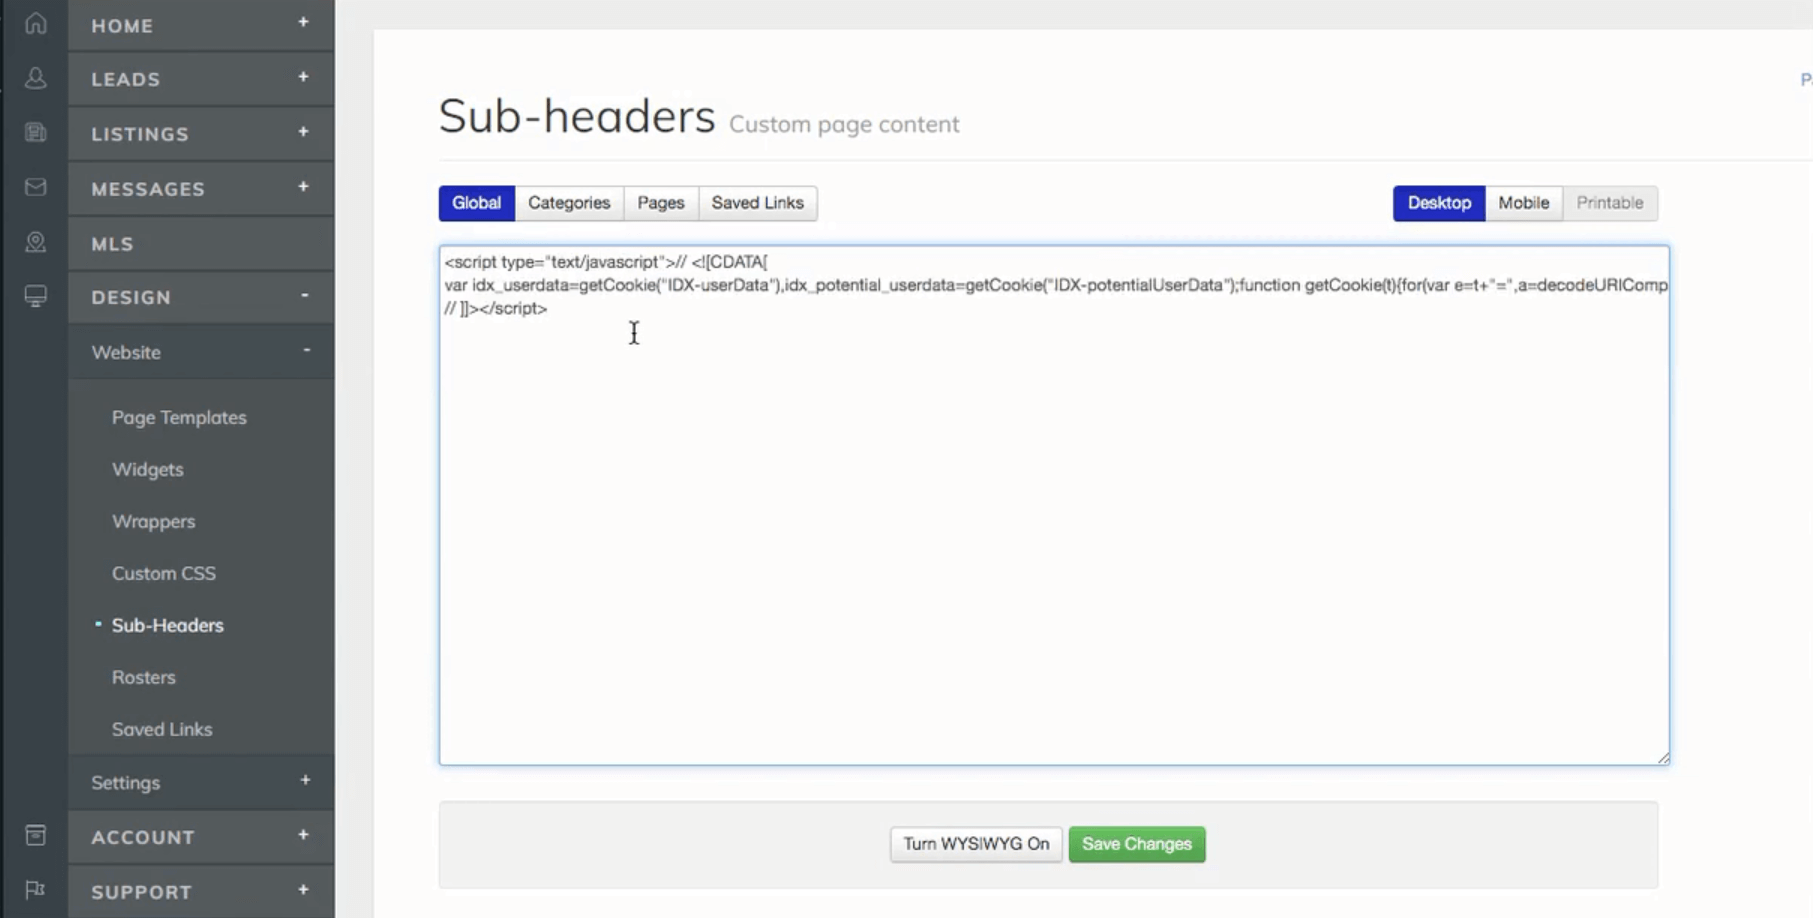
into the Sub-headers page on IDX Broker. This page is located on the sidebar under “Design” and then the sub-label, “Website”. You can also use this link.
Turn off the WYSIWYG and paste the code into the box and click the “Save Changes” button.

Validating Configuration
After you’ve completed this step, you can go back to the Webhook section of the Text Alerts page on IDXAddons.com and click the “Validate” button. The results of this process will appear below.
If the email alert is not configured for a page, the validation is tagged red with a “Not Found” label rather than the green “Success” label. Green indicates the validation worked, red indicates something is wrong.
If all of them are tagged not found, you should try following these instructions again to double-check for any errors.
If only some are not validated properly, but some are, check back on your Sub-headers page again. You may have some pages that already have a custom Sub-header, effecting the configuration for the Webhook.
Click the tab labeled “Categories”, and add the Webhook code to each section that already has a custom Sub-header, right at the end of any other code in the page’s box. Try validating again after this process to check accuracy.
Below is a video tutorial that goes through these same steps: